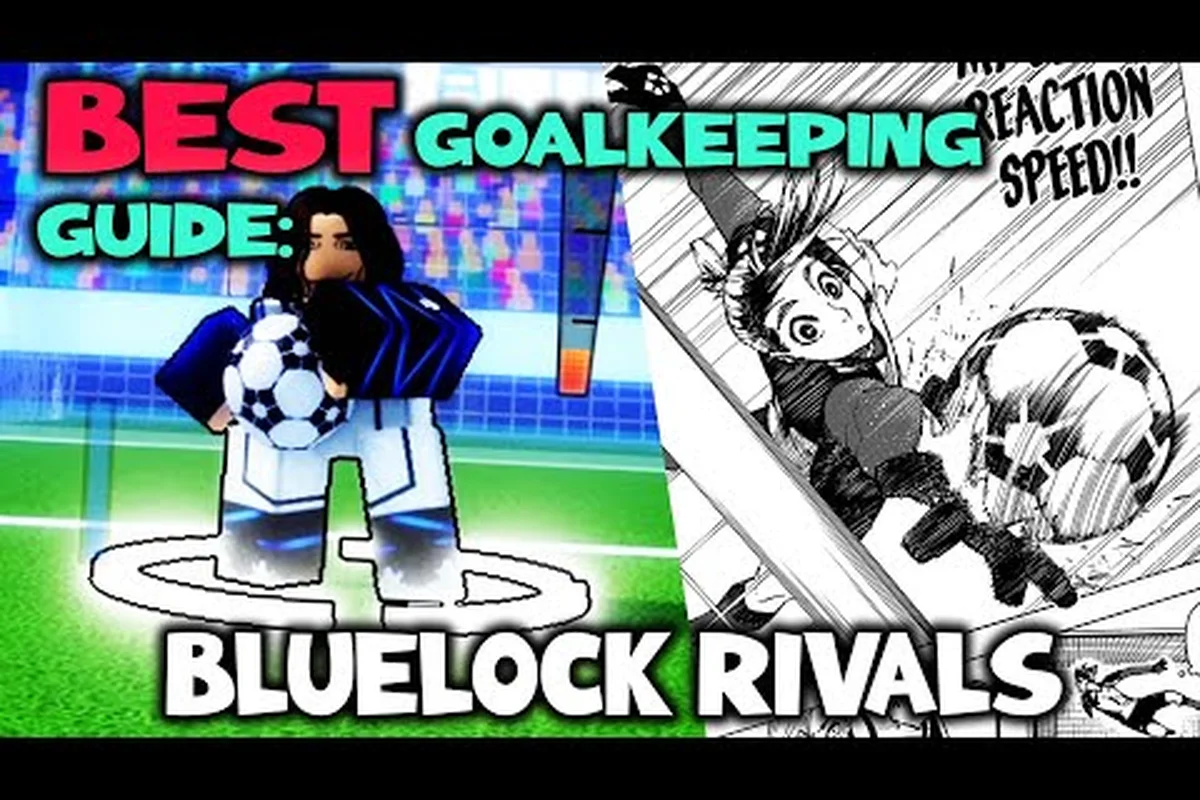
Blue lock rivals goalkeeper tactics matter because one misplaced dive can expose the entire 5v5 match. This blue lock rivals goalkeeper guide explains how to read shooters, protect your line, choose between catching and punching, and restart attacks before your defense can recover.
Starting Position Before the Shot Leaves
Good positioning lets you save shots without guessing. In a five-a-side match, the goalkeeper has to balance reaction speed with awareness of open space, and the official Blue Lock: Rivals page on Roblox confirms that goalkeeping is played by a real player rather than an NPC. That means your positioning affects the whole team instead of operating as a separate minigame.
Begin in a balanced central stance rather than drifting toward one post. Keep your feet active, your body facing the ball, and your hands ready at a comfortable height. As possession moves to either side, adjust by small steps so you remain able to react in either direction. Large, sudden movements often leave you stationary, which is especially costly when an attacker cuts back onto the opposite side.
| Match situation | Recommended position | Main reason |
|---|---|---|
| Shot from distance | Slightly off the line of the ball | Closing the angle early can leave the far corner exposed |
| Shooter on the wing | Align with the near post | This limits the shooting angle while preserving a route across goal |
| Through ball | Stay behind the defensive line | You should challenge when the attacker reaches it, not while they are still running |
| One attacker nearby | Stay goal-side of the ball | This protects the most dangerous direct route to goal |
| Ball far from goal | Stay compact and alert | Long possession can end with a quick shot |
| Counterattack | Reset to the line immediately | The defense may be badly outnumbered |
Start on the Line
Community coaching commonly recommends beginning on the goal line and stepping out only after the shooter commits. That approach works because it preserves reaction space, but “on the line” does not mean standing inside the goal. Your position should be slightly in front of the line and centered relative to the ball.
As the attacker approaches, evaluate three signals in order: the angle of the body, the position of the striking foot, and whether the ball is still under control. The hips often reveal the intended direction earlier than the ball itself. If the shooter opens the body toward the far side, prepare to move that way while keeping enough balance to correct if the player performs a fake.
Manage the Near-Post Space
Near-post shots are difficult because the goalkeeper can be caught between blocking the ball and guarding the open side of the goal. Do not automatically collapse into the post. Instead, take an angle that shows the striker slightly less space while preserving a path to the center.
When an attacker has a clear route into the box, meet the situation decisively. When the ball remains distant, aggressive positioning can be punished by a pass or rebound. The best goalkeeper responds to immediate threat level, not to a fixed distance that players often memorize from real football.
Protect the Far Side
A useful defensive habit is to keep the far post visible whenever possible. If the ball enters the penalty area on one side and your body turns away from the opposite side, a quick cutback can produce an easy goal. Turning your shoulders without fully crossing your feet is often enough to maintain awareness.
Once the attacker enters a shooting position, though, track the ball and commit. Overcorrecting on positioning is a common problem for new keepers because they hesitate after every touch. Use the balanced stance until there is enough information, then make one decisive movement.
The goalkeeper positioning and defensive angles guide adds a more technical layer to protecting the far side. Instead of merely showing the far post, use the goal frame, cutback lanes, and attacker touch direction to judge when to step, drop, or cover the near corner. For example, if a wide attacker moves the ball toward the byline, the goalkeeper should angle across the goalmouth without charging blindly, preserving space for a low cross or a rebound. This improves your defensive positioning and reduces the chance of conceding an easy finish from a cutback.
Goalkeeper Save Techniques
Your save technique should match the shot rather than relying on a single animation. Distance, pace, and shooting direction can all change at the last moment, so the useful skill is a repeatable process: read, load, track, and commit. This part of the blue lock rivals goalkeeper guide focuses on actions that remain practical in fast Roblox matches.
Read the Shooter
The most valuable cue is the relationship between the striker’s body and the ball. Community reports emphasize watching the hips because they often indicate the planted foot and intended striking direction. Keep your eyes up through the final touch; looking down at your character or the goal line can cause a late reaction.
| Read | Likely interpretation | Keeper response |
|---|---|---|
| Hips open toward one corner | The striker may be preparing to strike that way | Shift weight that way and prepare to dive |
| Plant foot fixed | The player is likely preparing to swing | Hold briefly, then commit after the kicking motion |
| Both feet square to goal | A central or disguised shot is possible | Stay balanced and watch the footwork |
| Ball pulled back | A change of direction may follow | Resist the first direction and keep options open |
| Striker approaches slowly | A finesse shot or hesitation move is possible | Delay the dive until the ball is committed |
Load the Dive Late
Diving early creates two problems. It exposes the part of the goal you expected to cover, and it makes recovery difficult if the attacker uses a fake. A better method is to wait until the shooter’s movement becomes decisive, push off with the nearer foot, and guide the body toward the ball’s path.
Think of the action as load, launch, extend. During the load, your weight shifts toward the likely side. At launch, your arms begin moving with your body. During extension, you focus on keeping the save hand in the ball’s path rather than reaching with an isolated arm. Although animation and control behavior should be verified in game, the community principle is consistent: late commitment preserves better coverage.
A full breakdown of dive timing and save selection appears in the dedicated guide to saving shots in Blue Lock: Rivals. For example, when a striker commits to a shot from the edge of the penalty area, delaying the dive lets you react to the final placement instead of locking into an early direction; that can preserve coverage of the opposite post while your hands remain ready for a quick, low save. Use the guide to compare save selection against the shooter’s body angle, ball path, and goalkeeper momentum.
Catch, Parry, or Punch: Choosing the Response
Catching ends the immediate threat and lets you restart possession, but it can be risky when a defender is close. Punching sends the ball away from goal and may prevent a collision, although it offers less control over the next phase. Choose the method based on pressure, distance, and where the ball is headed.
| Condition | Safer choice | Reasoning |
|---|---|---|
| Shot is within comfortable reach | Catch | You gain control and can start an attack |
| A defender is charging the keeper | Punch | It reduces contact risk and moves the ball away |
| Shot is powerful but slightly off line | Punch toward the side | A controlled catch may be unrealistic |
| Attacker is alone with no nearby defender | Catch when possible | Possession gives the strongest transition |
| Rebound is likely near the goal | Punch or cover | Holding the ball may leave a dangerous rebound |
| Teammates are moving forward | Catch | The team can counterattack immediately |
Do not wait until the ball reaches your body to decide. A clean save starts before contact, because your hands need to be in the correct space and your torso needs to face the shot. When a catch is uncertain, prioritizing direction over possession is usually the safer approach.
Recover After Every Save
The first shot is not always the last opportunity. If you punch or parry a powerful effort, land facing the goal and immediately reset. Jumping toward the ball can leave your back exposed to a rebound. Stay low, locate the loose ball, and force the attacker to take another touch.
After a save, treat the first contact as a decision point rather than an automatic recovery: if the ball is still live near the six-yard area, use a controlled parry or secure the rebound before looking to distribute. If the shot has been pushed away from goal, recover your stance, scan for the attacker’s second ball, and choose whether to hold your line or move toward the loose ball. This prevents a powerful initial effort from turning into an uncontested tap-in and keeps the goalkeeper’s positioning advantage intact in the Blue Lock: Rivals match.
-
Track: Follow the ball after contact rather than assuming it is out of play.
-
Reset: Recover to your feet and regain a balanced position if you have time.
-
Cover: Step toward a loose ball rather than charging beyond the goal.
-
Protect: Prioritize the available goal space over securing a risky catch.
Turning a Save Into a Counterattack
Stopping the shot is only half the goalkeeper’s job. Distribution determines whether your team attacks with numbers or spends another phase recovering from your area of the pitch. In a five-a-side format, the open space after a save can become dangerous for the defending team, so quick distribution matters.
Release the Ball Quickly
A held ball wastes time if your team still needs to recover from your area of the pitch. Look for a short option immediately after securing possession: a teammate in space, a safe pass into the wing, or a clearance that removes pressure without sending the ball straight back toward goal.
Before passing, check three things. First, identify the nearest opponent. Second, see whether your teammate is facing forward. Third, make sure the pass does not travel into a crowded central lane. A long pass may look exciting, but a simple possession pass can produce a better numerical advantage in a compact five-a-side match.
The guide to goalkeeper controls and distribution covers the practical distinction between controlling the ball, moving it out of danger, and choosing a forward target. In Blue Lock: Rivals, that choice should follow the pressure rather than rely on one default distribution pattern: if a winger breaks beyond the last defender, aim the release forward; if the center is blocked, redirect possession toward the flank instead. Treating securing possession, clearing the danger zone, and finding a forward target as separate goalkeeper decisions helps prevent a successful catch from turning into a slow or dangerous attack.
| Distribution situation | Preferred action | Risk to avoid |
|---|---|---|
| Teammate available nearby | Short ground pass | Passing into an opponent’s challenge |
| Wing space is open | Lead the winger forward | Hitting a stationary teammate with a heavy pass |
| Central lane is crowded | Move possession toward the side | Forcing a risky through ball |
| A defender is almost on you | Clear the danger zone | Trying a controlled dribble near goal |
| Counter is fully open | Release quickly toward the leading player | Holding possession until the defense recovers |
Create Width
A goalkeeper who always passes to the nearest central player can help the opposition compress the field. Before choosing a target, scan from one side of the pitch to the other. Passing toward a player with room to move can pull defenders away from the other side, creating a better lane for the next pass.
You do not need a perfect long pass to create an advantage. Even a controlled pass toward the flank can widen the defense and encourage your winger to carry forward. Keep the pass simple when under pressure, then look for the next attacking lane after the ball is released.
Understand the Team Context
Goalkeeping decisions depend on your teammates. If both fullbacks are forward and the center backs are caught high, distribution becomes more urgent because a counter could begin immediately. If your team controls possession deep in the opponent’s half, your goalkeeper may have time to initiate a structured buildup.
Watch how defenders rotate after a shot. If one defender is available beside you, a short pass can combine safely. If they have moved wide to press the ball carrier, a direct release may be better. These small pieces of information separate a keeper who merely reacts from one who starts the next attack.
GK Guide to Shot Prevention
The strongest goalkeeper does not wait for every attack to become a shot. Reading the buildup can produce easier decisions, especially when a teammate can pressure the ball carrier. The objective is not to leave your area recklessly; it is to discourage the most dangerous shooting lane without exposing your teammates.
Recognize the Dangerous Receiver
Watch the first pass after possession changes. A central player turning toward goal, a winger reaching the ball near the box, or a striker making a diagonal run are common danger signs. Once you identify the receiver, position so you can see both the ball and that runner.
When your team has the ball, you can hold a higher starting position to discourage a long pass. When the opposition has possession, drop back toward the line and eliminate the direct shooting lane. This does not mean abandoning the area around your goal; it means adjusting the depth to the current phase.
Force the Shot Into a Known Area
Goal-side positioning narrows the attacker’s available angle. If a striker moves toward the wing, show the near side and guide them toward a predictable finish. You cannot completely control which shot they choose, but you can make the dangerous angle more expensive and the safer action more available.
Compare each positioning choice against the shooter’s likely path rather than judging it in isolation. For example, when the ball is switched toward the wing, use the goal-line angle to protect the near post, but delay stepping across until the attacker commits; premature movement can open a cutback route to the far post. This lets you trade reaction time for better side coverage without giving away an easy finish.
| Positioning choice | Benefit | Main risk |
|---|---|---|
| Stay tight to the line | Maximum reaction time | Large open area appears early in the attack |
| Step toward the shooter | Reduces shooting angle | A cutback can expose the opposite side |
| Move toward the ball side | Helps cover the near post | The far post becomes harder to reach |
| Stay centered | Covers both directions evenly | A wide opening can create a slight advantage |
Balance matters more than rigidity. A keeper who never leaves the line can be beaten by a routine one-on-one, while a keeper who constantly rushes can be chipped or passed. Change depth only when the ball, the receiver, and your teammates support the decision.
Coordinate With the Defense
Goalkeepers benefit when defenders clearly challenge attackers rather than all rushing at once. If a defender steps up, that attacker’s route toward goal becomes more dangerous, so adjust accordingly. If the defender fails to arrive, remain ready for a shot or square pass.
Communicate by behavior because voice chat may not always be active. Pointing or turning your body can signal where an opponent is heading, but animation duration should be verified in game. The key principle is to avoid assuming a defender has won a duel when you cannot see the result.
The 1v1 goalkeeper defense guide expands on how to balance pressure from the field with reliable protection of the goal area. In Blue Lock: Rivals, your GK should hold a compact defensive line instead of chasing the ball toward a winger and leaving the center exposed. For example, if an attacker receives the ball near the edge of the penalty area, close the shooting angle while keeping enough space to react to a quick through ball; when a defender commits to the challenge, stay behind that duel rather than charging out. This lets you cover the most likely shot or square pass without abandoning the goal.
Goalkeeping Tips for Matchday Improvement
Consistency develops when you use the same pre-save and post-save routine every time. Random focus often turns into repeated concessions, especially when a match offers little time to reset. A compact routine makes it easier to recognize patterns and correct errors after the whistle.
Build a Six-Step Match Routine
Use this sequence before every attack, but adapt its timing to the shooter’s distance and the pressure around the ball. Start in a compact, balanced stance so you can react without crossing your feet, then make one controlled adjustment as the shot develops. For example, against a powerful attacker closing from the side, keep your hips square to the ball, avoid committing early, and preserve enough space to push out toward the shot. The sequence should feel like a repeatable decision process, not a chain of fixed animations; each step should help you identify the next action while reducing hesitation.
-
Scan: Find the ball and the nearest attacker.
-
Align: Center yourself relative to the ball without abandoning the goal.
-
Track: Read the receiver’s hips, feet, and approach direction.
-
Load: Shift weight only when the attacker begins to commit.
-
Save: Choose catch, punch, or a cover based on pressure.
-
Restart: Release possession quickly when safe.
The purpose is not to make you rigid; it is to reduce wasted movement while preserving reaction speed. In Blue Lock: Rivals, excessive lateral shuffling can leave you arriving at the correct side of the goal without the momentum needed for a save or follow-up push. For example, if an attacker cuts in from your right, keep your feet active but controlled, then drive toward the shot once you have read the approach. Efficient footwork saves stamina for the decisive moment: the save attempt itself, or the push that turns a block into a possession restart.
Correct the Latest Mistake
After a conceded goal, review one cause rather than the entire match. Did you move too early, fail to cover the far side, wait too long for a catch, or distribute into pressure? Most goals have an actionable cause, and fixing one repeated mistake is more useful than making several vague adjustments.
| Mistake | Likely correction |
|---|---|
| Diving before the shooter committed | Hold the balanced stance longer |
| Chasing a cutback across goal | Recover toward the center when beaten |
| Trying to catch every shot | Punch when contact is unlikely or crowded |
| Standing outside the goal too early | Return to the line and adjust with small steps |
| Holding the ball under pressure | Release before the defender closes |
| Passing into the central crowd | Move possession toward open width |
Practice in Realistic Scenarios
Training against predictable shots is not enough. Try to practice against varied shooting angles, including the near post, far post, central strikes, and a shot after a cutback. Community videos such as Floaty 2’s five Blue Lock: Rivals tips can offer additional match-oriented observations, although individual timing claims should always be checked in the current game.
Use short, focused sessions rather than repeating the same action without feedback. For example, spend one session staying late on the line, one session choosing between catch and punch, and one session distributing after possession. This blue lock rivals goalkeeper tutorial is therefore best applied as a small training plan rather than a list to memorize.
Choose a Style That Suits Your Role
Your selected Style determines which abilities are available during a match, according to the official game information. The verified roster includes Gagamaru as the reference goalkeeper Style and Aiku as the defensive Style associated with the NEL wave. Exact ability effects and balance are not documented in the available sources, so verify them in game before assuming a particular Style is stronger.
A practical comparison should focus on play style rather than unsupported numbers: Gagamaru’s role identity centers on a dedicated goalkeeper approach, while Aiku is tied to the defensive NEL wave identity. Because current ability ranges, cooldowns, and balance are not documented in the available sources, test both Styles in the live interface. Compare how each affects positioning, shot-stopping, and distribution instead of assuming that the name “defensive” guarantees stronger goalkeeping performance.
| Consideration | Gagamaru | Aiku |
|---|---|---|
| Role identity | Reference goalkeeper Style | Defensive Style from the NEL wave |
| Best fit for | Players wanting a dedicated goalkeeper identity | Players interested in a defensive identity |
| Verification needed | Current abilities, range, and cooldowns | Current abilities, range, and cooldowns |
| Shared requirement | Good positioning, reading, and quick distribution | Good positioning, reading, and quick distribution |
For a deeper Style comparison, review the dedicated guide to the best goalkeeper Style options. The correct choice cannot be established from names alone because the current interface and balance should be checked directly.
Goalkeeper Guide: Common Match Mistakes
Even a strong goalkeeper can lose clean sheets by making the same decision at the wrong moment. Most mistakes come from a lack of information, an overly aggressive reaction, or poor awareness after a save. Identifying these patterns makes them easier to correct in the next match.
Stepping Out Before the Shooter Commits
Stepping forward can reduce an attacker’s angle, but doing so before the ball is committed often leaves a visible route to the far corner. If the defender wins the ball, you may have made the forward movement for nothing. Use a short approach when the threat is immediate, then retreat rapidly when possession changes.
Watching the Ball Instead of the Player
The ball can be feinted, dragged, or shifted across the body. The shooter’s hip and foot position often provide earlier information. Maintain a view that includes the player’s torso and striking leg, then confirm the ball’s path as the swing begins.
Chasing Every Rebound
A powerful save often sends the ball farther than expected. If you dive through the original shot, landing and immediately sprinting may create a second opening. Recover toward the center, assess whether an opponent has possession, and make the shortest safe movement.
Overvaluing Possession
A clean catch looks better than a punch, but the correct decision depends on pressure. If an opponent is sprinting directly at you, trying to secure the ball can cause a collision or expose the rebound. Punching away from goal may be the more responsible choice.
Holding the Ball Too Long
After a catch, the goalkeeper becomes a stationary target. If teammates are not available and the opposition is close, release the ball quickly rather than waiting for a perfect pass. You can still find a useful outlet by moving it toward open width.
Ignoring the Defensive Shape
The nearest defender may be pinned, beaten, or out of position. Do not rely on a teammate to clear a cross simply because they are nearby. Track the ball into the danger zone, identify the active opponent, and cover the goal that the play can reach.
| Error | Better decision rule |
|---|---|
| Dive on the first touch | Wait for the striking motion unless the angle forces an early move |
| Guard the post without watching the center | Keep the ball-side angle while monitoring the cutback |
| Catch under heavy pressure | Punch when a safe catch is unlikely |
| Search for a perfect passing target | Choose the best available short or wide option |
| Stand deep after clearing the ball | Reset while the attack is still developing |
| Chase a rebound blindly | Recover centrally and evaluate the second ball |
The goalkeeper role in Blue Lock: Rivals is decided in small intervals: a few steps on the line, one well-timed shift, a safe choice between hands and fists, and a fast release. Treat positioning, save selection, and distribution as one connected routine rather than three separate skills, and verify Style-specific details in the current game because balance and ability information can change.
Frequently Asked Questions
What is the best way to learn the goalkeeper role in Blue Lock: Rivals?
Start with balanced positioning, late dive timing, and fast distribution. Practice against different shot directions instead of memorizing one animation. The official game page confirms that goalkeeping is player-controlled, so regular match practice matters more than waiting for an NPC to perform a fixed routine.
Should a goalkeeper always dive early to cover the shooting angle?
No. Moving early can leave the opposite side open, especially against a cutback or disguised shot. Watch the striker’s hips, planted foot, and kicking motion, then commit once the direction becomes clear. Adjust earlier only when an immediate angle demands it.
When should a goalkeeper punch instead of catching?
Punch when the ball is difficult to control, a defender is closing, or a rebound is likely. Catching is stronger when the shot is comfortable and no opponent is nearby. The right choice protects the goal first, then gives your team the best possible chance to begin the next attack.
Which Style should a new goalkeeper select in Blue Lock: Rivals?
Gagamaru is the verified reference goalkeeper Style, while Aiku is the defensive Style associated with the NEL wave. Their exact current abilities are not documented in the available sources, so test them in game and compare range, availability, and playstyle rather than assuming one has a higher rating.
How can a goalkeeper avoid conceding after a rebound?
Recover toward the center, keep your body facing the loose ball, and judge whether an opponent can reach it. Avoid charging beyond the goal after a dive. If the attacker has a clear route, close the angle; if the ball is loose near the goal, cover the space before attempting a catch.