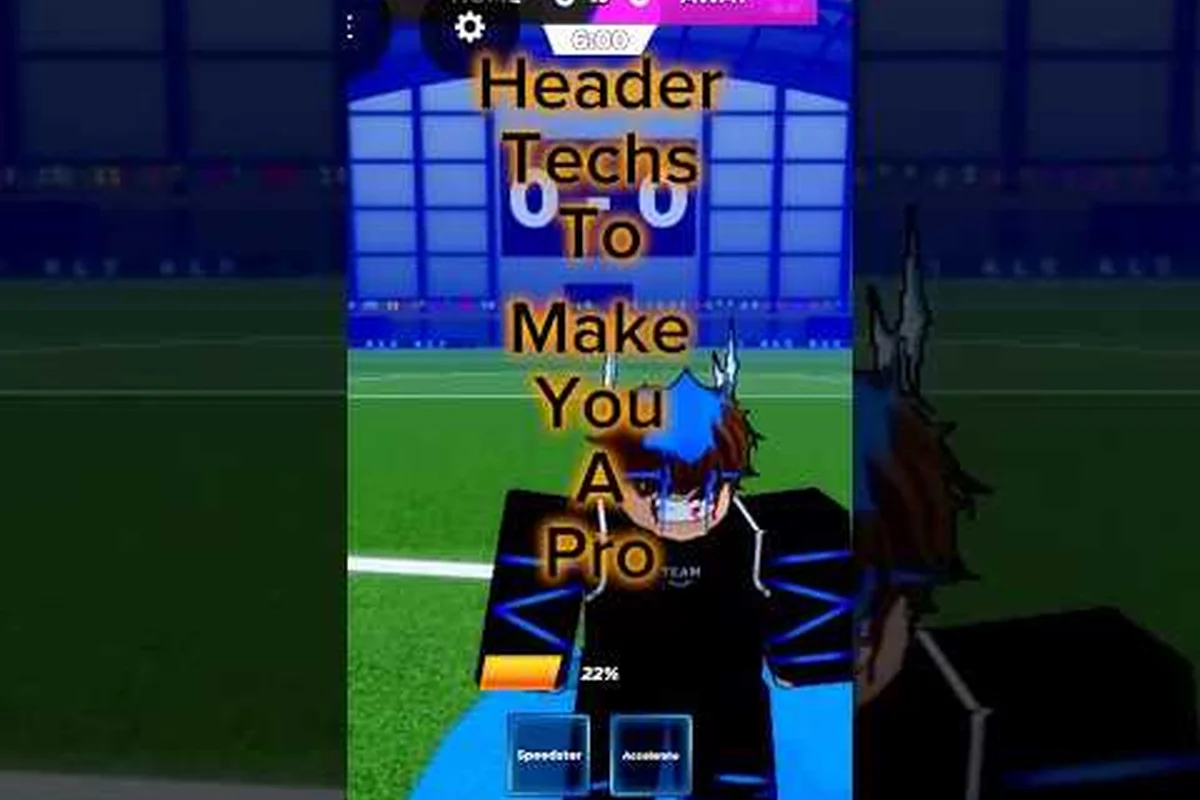
Blue Lock: Rivals headers can turn a well-timed cross into a decisive aerial duel, so mastering the jump early gives your team more ways to score. Learn the timing, positioning, and shot selection that separate clean contacts from hopeful ones in 5v5 Roblox matches.
Headers: The Timing Behind Every High Ball
A header in Blue Lock: Rivals depends on anticipating the ball rather than waiting for it to arrive. The game's official Roblox page (checked November 2026) identifies headers as part of the core mechanical layer, and explains that the jump begins before the ball reaches the player. That detail changes how you should approach a cross: read the flight, move into the projected landing area, and begin the aerial motion early.
Many missed blue lock rivals headers happen because the player presses the header action at the exact moment the ball seems nearby. By then, the jump may already be too late for the intended contact point. Successful headers instead begin with a timing plan and use the cross as a moving target rather than a surprise.
-
Anticipate the flight before the cross is struck.
-
Move behind the defender, not directly toward the visible ball.
-
Start the jump early and adjust during the rise.
-
Aim the header toward a real scoring lane.
-
Follow the rebound if the first contact does not end the play.
The key principle is simple: attack the space where the ball will arrive. If you chase its current position, you will usually be underneath it. If you anticipate its path, you can meet it at a useful height and direction.
How to Header: A Repeatable Timing Sequence
The most reliable approach to blue lock rivals how to header practice is to divide the action into three stages: preparation, contact, and recovery. You do not need to memorize exact frame data, because the official material does not document frame windows, cooldowns, or damage values. Instead, build the technique around visible cues that tell you when the cross, volley, or set-piece delivery is approaching.
Read the delivery
A ground cross gives you a long runway to judge speed and direction, while a lofted delivery hides its landing point behind defenders. Look at the passer’s body position, the ball’s launch angle, and the open space beyond your current marker. If the cross comes from wide, the central channel may be the right target because defenders often compress around the nearest attacker.
Move before jumping
Run toward the point where the ball is likely to descend, but avoid sprinting directly beneath it. A short lateral adjustment is often more useful than a long forward run because it keeps the defender behind you. This same positioning principle appears in defensive scenarios too: opponents who wait directly under the ball often lose the aerial duel because they give the attacker a clear line.
Contact during the rise
The page-verified mechanic is that the jump starts before the ball arrives, so your task is to make the animation overlap with the delivery. Treat the visible ball as a reference point, not a trigger. If you wait until it is directly in front of your avatar, the aerial action may begin too late.
Once you make contact, direct the ball toward open grass, the edge of the box, or a teammate making a supporting run. A header is not automatically a shot; the best option may be a controlled redirection that creates a second chance.
| Stage | What to watch | Player action | Common mistake |
|---|---|---|---|
| Delivery | Cross angle, ball height, nearby defenders | Identify the projected landing zone | Looking only at the passer |
| Adjustment | Space behind the defender | Move across the defender’s path | Waiting directly under the ball |
| Jump | Ball’s approach and your height | Begin the aerial action before arrival | Pressing the action after the ball is close |
| Contact | Direction toward goal or support | Aim into a clear scoring lane | Hitting the ball without a target |
| Recovery | Rebound or deflection | Land and continue toward the loose ball | Stopping after the header attempt |
This sequence works best when you practice one variable at a time. First find the landing zone without attacking it, then add the jump, and finally add directional control. For players who also want to improve ground control before returning to aerial challenges, the Blue Lock: Rivals dribbling guide can help with the movement that creates separation.
Crossing: Creating Better Aerial Targets
A header can look difficult because the delivery is difficult. Blue Lock: Rivals crossing works best when the passer creates a route that gives the attacker time to move, jump, and choose a direction. If the ball is sent directly toward a stationary defender, even a well-timed header will be hard to control or direct.
The useful crossing targets fall into three broad groups: the far-post corridor, central space, and near-post space, as outlined in the table below. Your choice should depend on the nearest defender’s position and how many runners remain available. If only one attacker is available, a central header may offer the clearest route to goal; if two runners attack the far post and central zone, the cross can pull the defensive line apart and create a better lane for the second header. This decision matters because a target that opens space for one attacker can become predictable when several Blue Lock: Rivals players converge on the same landing point.
| Target area | Best advantage | Header choice | Defensive risk |
|---|---|---|---|
| Far-post corridor | Reaches behind the first defender | Redirect across goal | Requires a late run |
| Central space | Offers a clearer shooting angle | Attack goal directly | Allows compact defending |
| Near-post space | Can surprise a defender facing the cross | Tap or steer around the challenge | Ball may cross behind goal |
For a central cross, arrive behind the defender and aim across the face of goal. For a far-post delivery, use a lighter contact that changes direction without requiring full power. The exact power required is not documented, so verify in game rather than assuming a fixed setting.
Timing also depends on the height of the cross. A waist-high ball can be attacked sooner, while a lofted cross demands more patience and a clearer view of the landing zone. The best passer understands what the attacker can see; the best attacker gives the passer a target by making a decisive run instead of wandering around the penalty area.
When a defender gets between you and the ball, attack the crossing space rather than the defender’s body. Curving around the outside can create a cleaner header, but an abrupt cut across the defender’s face may be easier to read. The choice depends on your character’s movement and the pressure around you.
Volley: Finishing Balls Without Waiting
A blue lock rivals volley is especially valuable when a cross reaches the central attacker before the defense can reset. The difference between a volley and a conventional header is the limited time to settle your body. You must use the ball’s speed and direction to create the shooting angle rather than waiting for a stationary setup.
Volleys reward three specific actions. First, read the cross early enough to know whether it will arrive in front of goal. Second, establish enough distance from the nearest defender to make contact. Third, aim the first contact toward a visible lane instead of simply following the ball’s current trajectory.
Redirect, don’t blindly smash
Power is useful when a defender is screening the goalie or when the goalkeeper is clearly beaten to one side. Placement is more valuable when the goalkeeper is centered and the ball arrives near the edge of the scoring area. Since power and placement form part of the shooting system, you can pair aerial positioning with the mechanics in the Blue Lock: Rivals shooting guide.
| Volley situation | Recommended contact | Why it works |
|---|---|---|
| Goalkeeper centered | Aim away from the keeper | Forces a lateral reaction |
| Defender at the near side | Redirect toward the far side | Uses the blocked angle against the defense |
| Ball arriving at close range | Use controlled contact | Reduces the chance of a heavy or inaccurate touch |
| Open sightline | Take a direct shot | Avoids overcomplicating a clear chance |
| Deflected drop | Prepare for a second header | Tracks the rebound instead of stopping |
A useful training rule is to prioritize accuracy on your first three aerial attempts, then add power once your timing is dependable. High-speed headers can hide poor positioning because a powerful contact sometimes reaches the goal despite mistimed contact. More controlled contacts reveal whether your movement and timing are truly sound.
Timing the Jump Against Contact
Watch the goalkeeper and nearest defender as the cross travels. If the goalkeeper steps early, the far side may become more reachable. If a defender turns toward the ball, a quick change of direction can exploit the space behind them. If everyone remains planted, use a direct route and avoid an unnecessary extra touch.
Aerial Duels: Winning the Second Ball
Blue Lock: Rivals aerial duels are not decided only by the first contact. A defender can win the initial header, lose the landing space, and still recover for the clearance. Attackers need a plan for what happens after the ball is touched because a deflection can create a better chance than the original delivery.
The important distinction is between first contact and second contact. The first header can be used to direct the ball away from a defender. The second contact can be taken closer to goal once the defender’s momentum carries them out of the play. This is why a header that initially looks weak can still produce a dangerous chance.
Establish priority
Attackers should try to arrive first and make a clean contact behind the defender. Defenders should challenge from the front when possible because it reduces the attacker’s view and ability to direct the header. When an attacker gets underneath the ball, the defender can stay tight and prepare for the second ball. When the defender wins the first phase, the attacker must recover quickly.
| Phase | Attacker objective | Defender objective | Best indicator |
|---|---|---|---|
| Before contact | Arrive behind the defender | Front-foot the challenge | Who controls the landing zone |
| First contact | Direct the ball into danger | Clear the danger zone | Angle of the outgoing ball |
| After contact | Move toward the rebound | Contest the second ball | Who lands with separation |
| Second contact | Shoot or redirect again | Clear or block | Space toward goal |
Aerial strength also depends on what happens underneath the play. If teammates stop defending the rebound, an attacker may win the header but have no support for the second ball. Keep one runner central, one beyond the defensive line, and at least one player available outside the immediate contest whenever possible.
Set Pieces: Corners, Free Kicks, and Delivery Plans
Blue Lock: Rivals set pieces give the attacking team time to organize, but they can become predictable if the same runner and target are used every time. The header is only one part of the routine: delivery, movement, contact, and follow-up must work together.
For a corner, place one attacker at the near post, one at the far post, and one in the central zone. The central runner should attack the space rather than begin at the goal line and wait. Near-post and far-post runs can pull defenders apart, while the central target arrives with momentum and options.
Vary the starting position
A player who begins far from goal may create a clearer run than one who starts in the target area. The defender must react to the initial movement, and the attacker can attack the vacated space. Exact run distances are not documented, so use visual positioning rather than fixed coordinates.
| Set-piece structure | Initial positioning | Purpose |
|---|---|---|
| Near-post crowd | Two attackers close to the front of goal | Create an initial header target |
| Far-post overload | Two attackers deeper on the opposite side | Stretch the defense |
| Central isolation | One attacker between the main group of markers | Attack the first cross |
| Short corner option | Two attackers near the delivery point | Create a rehearsed combination |
| Rebound support | One player outside the main cluster | Secure the second ball |
The delivery should fit the intended target. A lofted corner offers a player time to run, while a faster ball can catch the defense moving. The best option is the one your designated headerer can attack cleanly, not simply the ball with the most power.
Set pieces also benefit from planned reactions. If the first header is cleared toward the edge of the area, the supporting runner should already be facing the rebound. If the defender wins the contact, another attacker should move to the dropping ball instead of freezing. The Blue Lock: Rivals passing guide can help with the short passes and one-twos that make these alternatives possible.
Training Headers Without Relying on Undocumented Values
Because official materials do not list exact frame windows, cooldowns, damage values, or fixed header power, practice should focus on feedback you can observe. The Blue Lock: Rivals Unofficial Fans community page identifies the experience as an unofficial fan tribute, so current behavior should always be confirmed in the live game.
Use a repeatable training routine that isolates timing, targeting, and recovery, then repeat the same aerial-duel sequence several times instead of switching exercises after every miss. For example, run one crossing drill, one volley attempt, and one contested-header scenario, recording whether the ball was met at the correct height and whether you recovered before the next play. Repeating this sequence exposes weak timing and targeting habits, while tracking your recovery helps you distinguish a clean header from a successful shot that leaves you out of position for the counterattack.
Session structure
Begin with stationary crossing from a wide area and concentrate on contact. Next, add a defender-shaped obstacle so you practice arriving behind the target. Then use lofted deliveries to develop aerial timing, and finish with live set pieces that include rebound coverage.
-
First phase: Read the delivery and start the jump early.
-
Second phase: Aim every header toward a visible target.
-
Third phase: Add a defender and attack the space behind them.
-
Fourth phase: Practice crosses, volleys, and corners in sequence.
-
Fifth phase: Track the rebound after every contested ball.
Diagnose the miss
| Symptom | Likely cause | Correction |
|---|---|---|
| Header sends the ball backward | Contact occurs too late | Begin the jump before the ball arrives |
| Contact has weak direction | No target selected during approach | Choose the goal side or teammate early |
| Defender always wins the ball | Similar starting position to the defender | Start away, then attack the vacated lane |
| Volley travels too high | Excessive power for the situation | Prioritize placement over power |
| Cross is never reached | Run begins without reading flight | Judge the projected landing point first |
| Team cannot collect rebound | Everyone commits to the header | Keep one player available outside the cluster |
Community videos can provide visual examples of play styles, but they should be treated as community observation rather than official rules. This Blue Lock: Rivals tips video by Floaty 2 is one example of player-led coverage, while current mechanics should still be verified in-game.
Advanced Header Routes for Cluttered Areas
Once basic timing becomes consistent, improve your decision-making in crowded spaces. The goal is not merely to reach the ball; it is to create a positive chance with limited defender pressure. That means choosing between a direct shot, a teammate target, and a controlled clearance based on what the first touch exposes.
Direct shot route
Use a direct header when the goal is visible, the goalkeeper is displaced, and the contact can be clean. Avoid forcing this route when a defender blocks the sightline. In that situation, redirecting the ball toward the far post may be more productive than producing a powerful shot straight into traffic.
Teammate route
A sideways or backward header can be valuable when your teammate is unmarked at the far post. The contact does not need to be spectacular; it needs to reach a safe area. Aim away from a defender’s body and toward space where the receiver can move into the ball rather than wait for it.
Rebound route
When the first header cannot be directed cleanly, touch it away from the goal and stay alive for the second ball. This can be effective if the goalkeeper is occupied by the first touch, but it requires support behind the contest. Avoid making every contact a rebound attempt because that removes the immediate threat and allows defenders to reset.
| Advanced situation | First choice | Alternative | Main risk |
|---|---|---|---|
| Clear shooting lane | Direct header toward goal | Teammate redirect | Overhitting the target |
| Defender blocks goal view | Redirect across goal | Rebound outside | Losing control entirely |
| Far teammate is unmarked | Header toward teammate | Controlled rebound | Passing into a defender |
| Goalkeeper committed early | Near-side finish | Far-post aim | Misreading the keeper |
| Crowded central zone | Touch away from traffic | Lay off | No clean shooting angle |
Attacking space rather than the visible ball remains the principle across every route. It improves first contact, helps you get behind a defender, and gives the cross a meaningful target. As you refine this skill, pair it with the broader Blue Lock: Rivals skill-moves overview so you can use the appropriate tools without expecting every Style to provide identical aerial options.
Header Rules and Match Responsibility
Blue Lock: Rivals headers succeed when timing, positioning, and direction support one another. Start the jump before the ball arrives, find the space behind the defender, and choose a clear target before contact. That simple system applies to wide crosses, central volleys, and set-piece deliveries without requiring undocumented frame data or assumed power values.
A practical match-day checklist keeps the team aligned: use a simple pre-attack routine, identify the delivery type, and mark the aerial duel before the cross, volley, or set piece arrives. For example, on a wide cross, check the defender’s position and take the route behind him; on a central volley, judge the dropping ball and prepare for contact rather than chasing it late. Each assignment should specify who attacks the first ball, who attacks the second, and who covers the space if pressure changes the timing.
-
Call the target so the passer understands whether to cross early or late.
-
Start the run away from goal before attacking the delivery space.
-
Keep one rebound option outside the main group of attackers.
-
Defend the front-foot challenge rather than following the ball blindly.
-
Practice in live matches because defender pressure changes how early the jump must begin.
The biggest improvement comes from treating a header as a planned attacking action, not a last-second reaction. Master the route into space, the early jump, and the intended contact point; the cross, volley, or set piece will then create a more dangerous chance.
Frequently Asked Questions
When should I start the jump for a header in Blue Lock: Rivals?
Start the aerial action before the ball arrives, using the delivery’s flight to predict the landing zone. The official game page identifies this early-start mechanic as the foundation of headers. Waiting until the ball appears directly in front of you can make the contact late and difficult to direct.
Where should I aim when heading a cross?
Aim toward a visible scoring lane rather than automatically shooting. The far side is useful when the goalkeeper or nearest defender favors the near post, while the center offers a direct route when the goal is open. A teammate near the far post can also become the target when a defender blocks your shooting view.
How do I improve in blue lock rivals aerial duels?
Improve your arrival, contact, and recovery as three separate habits. Arrive behind the defender, begin the jump before the ball arrives, and keep moving for the rebound. If your team commits every player to the first contact, practice leaving one attacker outside the contest to collect the second ball.
Is a header better than a volley in Blue Lock: Rivals?
A volley is usually better when the cross reaches the central attacker quickly and the defense has not reset. A more controlled header can be better against a settled defense or when a teammate is clearly open. The best option depends on the ball’s speed, the available angle, and the pressure around the receiver.
What is the best way to practice Blue Lock: Rivals set pieces?
Practice the complete routine rather than only the final header: organized starting positions, a readable delivery, an early run, a clean aerial contact, and a prepared rebound option. Vary near-post, far-post, and central targets so the defense cannot easily predict the final destination of every corner or free kick.